We have finally started getting some things done around our new house. I just forgot how long it really takes to get things how you want them at a new place. We ordered furniture for our living room and our kitchen and can't wait to get it! Too bad all of it is on back order. Until then, we will just sit on the floor. But, I did get my laundry room cornice board made! I am so excited about it because I chose a funky fabric. I decided that since I am the only one in there and I am in there A LOT...I wanted it to be fun. After all, no one sees it but me. :)
So, here is a little no sew tutorial of my laundry room cornice.
First, you want to get a cute handy guy to measure and build the actual cornice. I chose him:

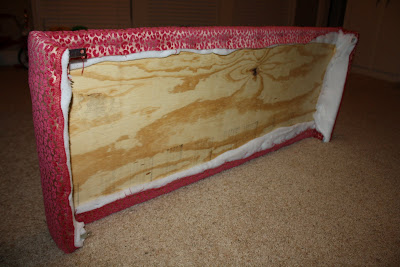
Basically, he just nailed to pieces of ply wood to the ends of another piece of wood to give the cornice a way to stick on the wall? This is very technical, people.

I used about 3 layers of batting. I bought a bag of batting from Michael's for about $12. The staple gun works great for this.

I used a lot of staples to go around the entire thing. You want to make sure you pull it really tight so there are no wrinkles.

The best part...adding the fabric on top of the batting! I chose this fun, pink, cheetah print fabric. I almost didn't buy enough to cover the thing.


How did you mount it on the wall? I really love it and might have to make one myself:)
ReplyDeleteVery cute! I am wanting to do cornice boards over all the windows in my sunroom. It would definitely be a project, but I know it would just frame the room up so well! You did great! Very cute!
ReplyDelete